Cookie authentication is the standard authentication method included with WordPress. However, when using nonces you will often run into an issue with Postman throwing an error — “Cookie nonce is invalid” with HTTP Status of 403. In this article we will talk about how to deal with this issue and make WP Rest APIs work in Postman. Hope you are feeling excited. So, let’s dive in..
Cookie authentication method relies on WordPress cookies. As a result this method is generally applicable when the REST API is used inside of WordPress and the current user is logged in. In addition, the current user must have the appropriate capability to perform the action being executed.
To make WP Rest API work with Postman, we need to setup the security token, get the appropriate cookie and pass the correct parameters in the request header.
Step 1: Grab the current nonce
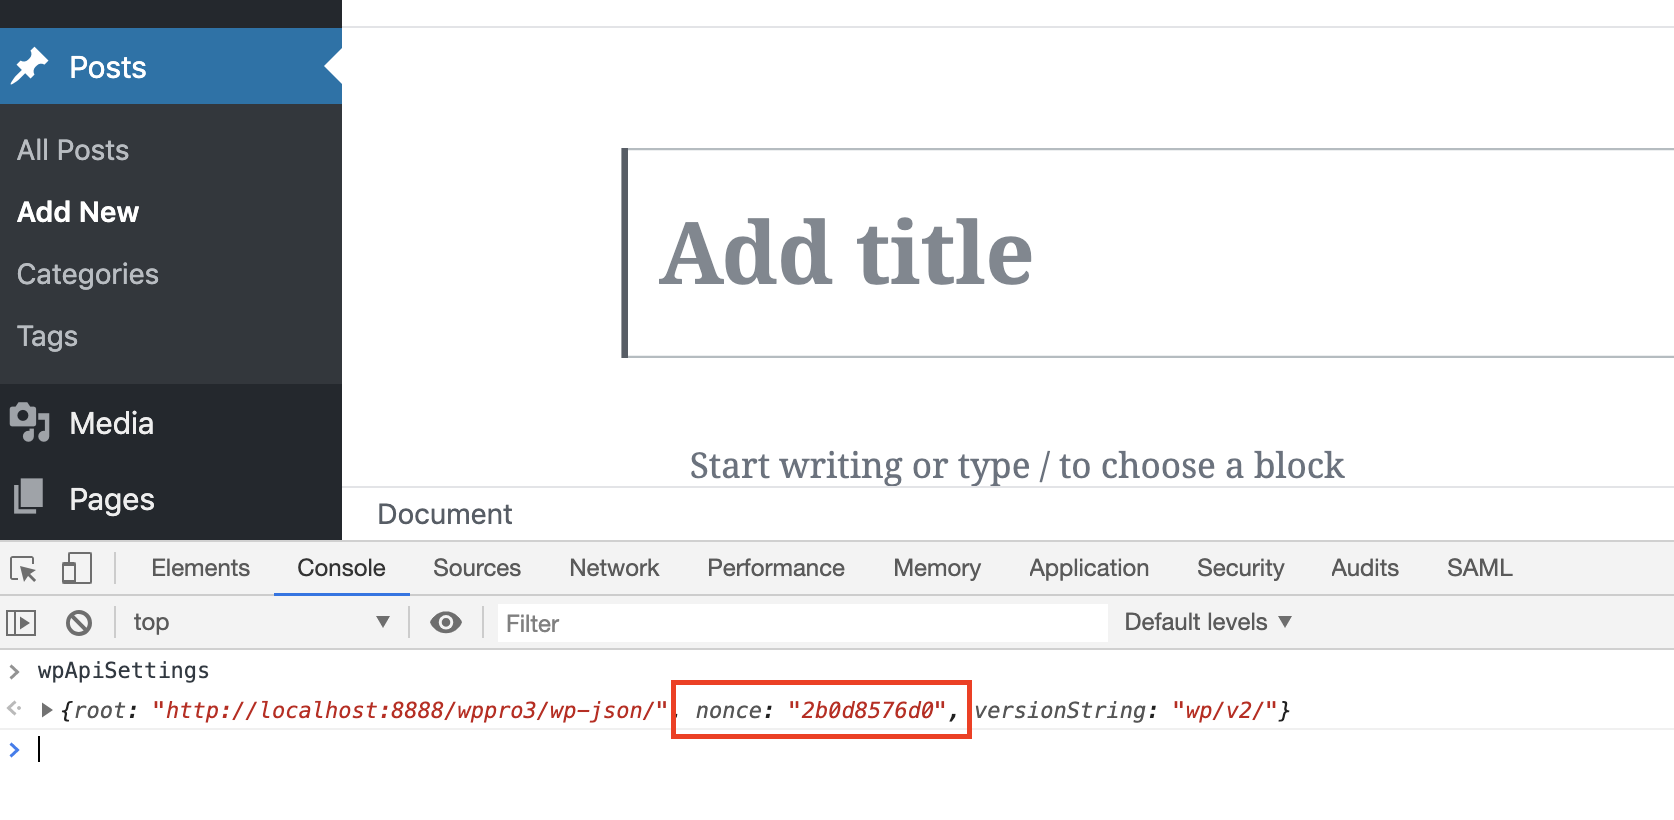
The nonce acts as the security token. So, login into your WordPress environment and simply try to create or edit a post. WordPress injects that token/nonce in the post editing screens.
WordPress nonces have a limited “lifetime” after which they expire. During that time period the same nonce can be reused for a given user in a given context.
Open the browser console, so that we can copy the nonce. Type wpApiSettings in the developer console and we will get the nonce.
Step 2: Grab the wordpress_logged_in cookie
On the same browser console navigate to the Application tab to grab the cookie. The cookie has two parts, Cookie Name and Cookie Value.
The Cookie we are looking for will have the following format — wordpress_logged_in_<hash>
The value will be a long string stored against the above name.
Example — admin%7C1589130602%7Ccw kZ7nYB eEITkO7FpIJck5YVgrnP49xXIHEycilSRzI% 7Ca2d3a5fcd39da8268b2a45d3993d4927 0b204e2b2406802250e4102ec40184
Step 3: Setup Postman to invoke the WP Rest API
Now that we have the two important pieces of data, let’s setup Postman request and call our REST API.
GET Example:
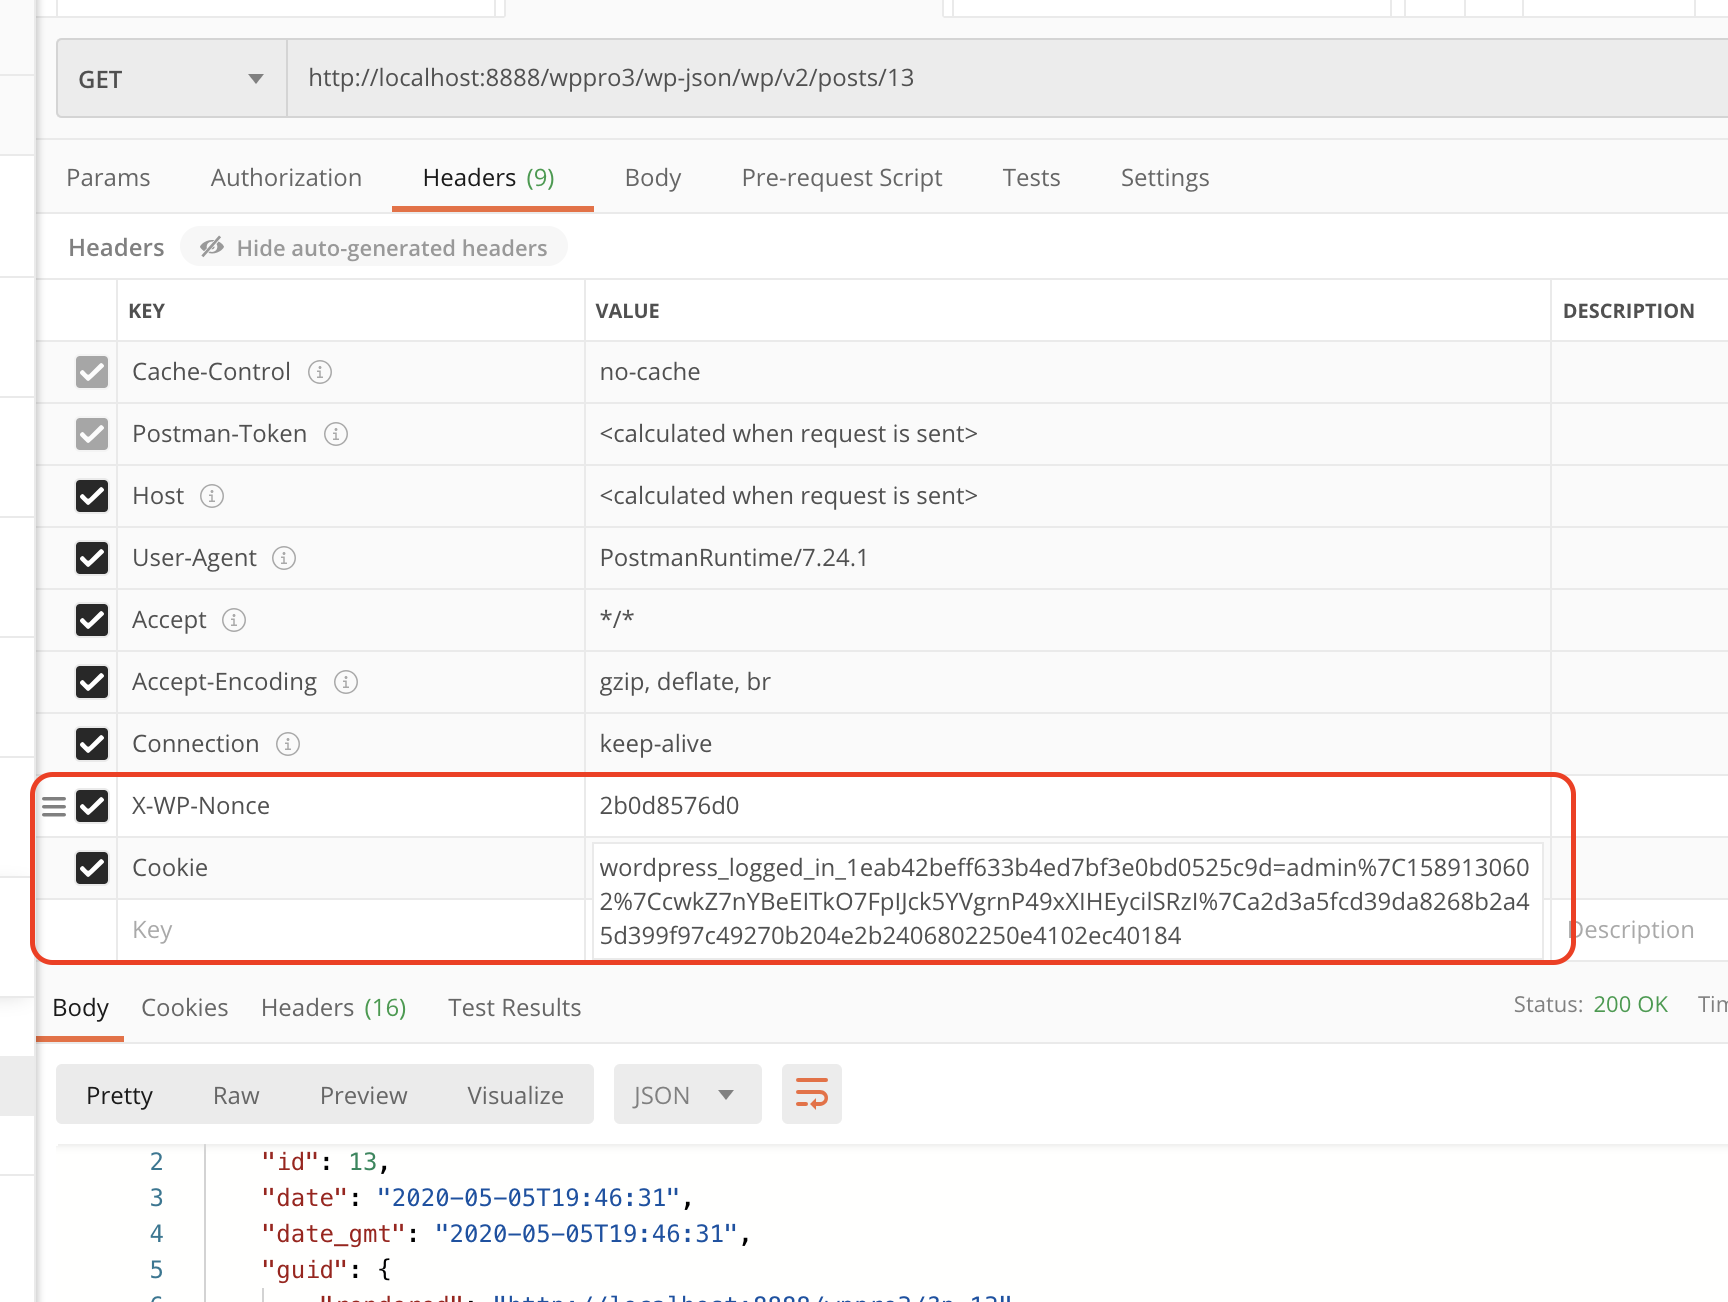
- Rest API URL — http://localhost:8888/wppro3/wp-json/wp/v2/posts/13 — will get the details of the post ID: 13
- Request Method : GET
- Header Parameters: We need to pass two additional parameters:
- X-WP-Nonce — <the value of nonce>
- Cookie — <The value of cookie, in the format CookieName=CookieValue>
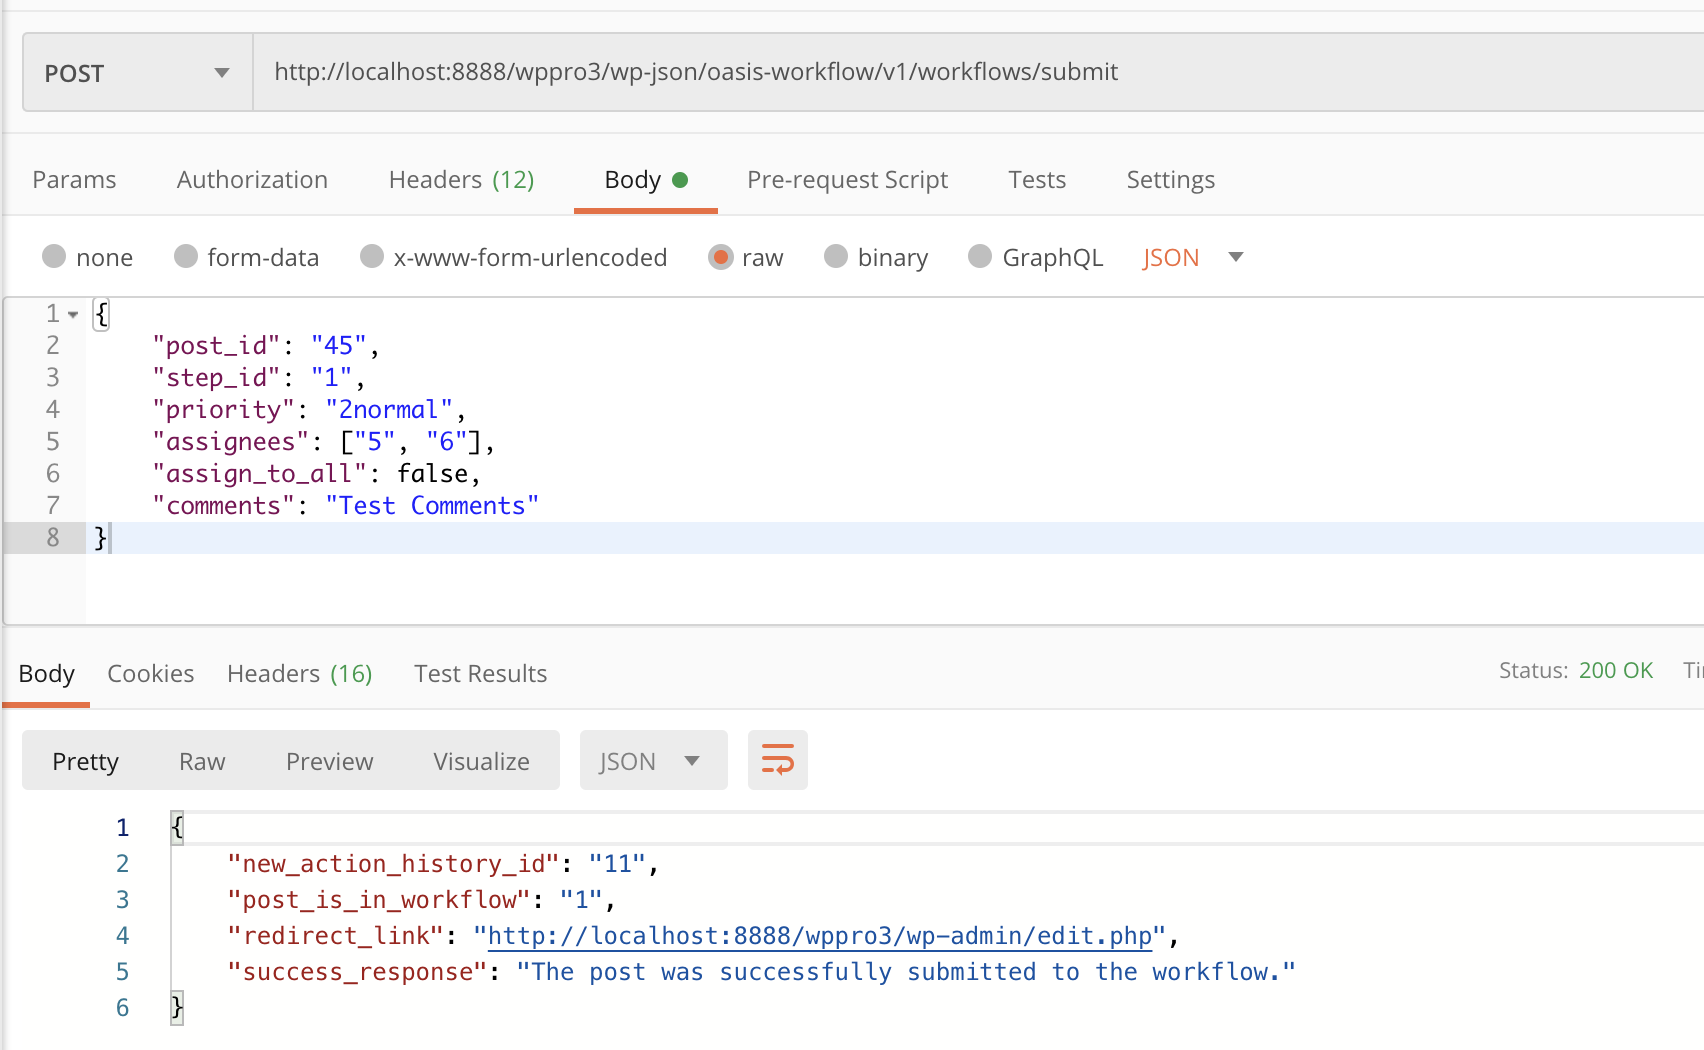
POST Example:
- Rest API URL — http://localhost:8888/wppro3/wp-json/oasis-workflow/v1/workflows/submit — will submit the post to a workflow in Oasis Workflow.
- Request Method : POST
- Header Parameters: We need to pass two additional parameters:
- X-WP-Nonce — <the value of nonce>
- Cookie — <The value of cookie, in the format CookieName=CookieValue>
Bonus — Using cURL for calling the same WP Rest APIs
curl -H “X-WP-Nonce: 2b0d8576d0” -X GET http://localhost:8888/wppro3/wp-json/wp/v2/posts/13 -b wordpress_logged_in_1eab42beff633b4ed7bf3e0bd0525c9d=admin%7C15 89130602%7CcwkZ7nYBeEITkO7FpIJck5YVgrn P49xXIHEycilSRzI%7C a2d3a5fcd39da8268b2a45d399f97c4927 0b20432b2406802250e4102ec40184
Voila!! We did it. Now, we are able to authenticate the WordPress REST APIs from within Postman. Happy coding.