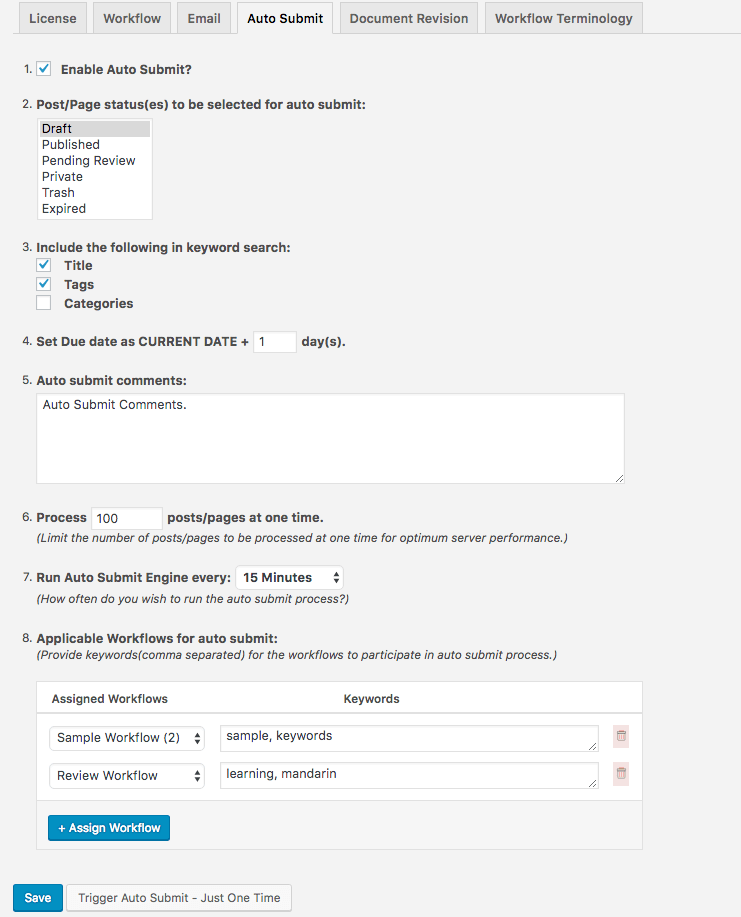
As the name implies, Auto Submit allows to automatically submit a post/page to an editorial workflow.
Once you have your workflow(s) setup correctly and working as per your editorial process requirements, we suggest you to look into auto submit to further help you reduce manual intervention into your workflow process.
How does auto-submit work?
Once the auto submit settings are saved, the process scans for articles that meet the criteria (post status and keywords) and submit those to the applicable workflows.
Step 1: Enable Auto Submit Settings
- Go to Workflows –> Settings –> Auto Submit
- Enable Auto Submit.
- Select post/page statuses that should be picked up for auto-submit.
- Specify keyword search criteria. The keywords can be looked into Post Title, Tags and Categories.
- Specify due date for the first step.
- Provide comments to be added as part of the auto-submit.
- Specify the number of posts/pages to be processed during one cycle.
- Specify how often you wish to run the auto submit process.
- Specify the workflows applicable for auto submit. Also specify keywords for a given workflow. If there is only one workflow, you do not have to specify keywords.
- Save the settings.
Step 2: Test Auto Submit
In order to test the setup, you can trigger auto-submit manually by clicking “Trigger Auto-Submit – Just one time” on the Auto Submit Settings page.
Didn't find what you are looking for? Submit a Query
Emails and NotificationsDifference between Groups and Teams Add-on
Emails and NotificationsDifference between Groups and Teams Add-on


